Created by Alyssa Lopez
What You'll Postulate:
- Some video footage in front of a green or aristocratic screen
- Extra images or video to exist altered into the background
- iMovie editing software
- USB/external disc drive
Adding Images and Editing:
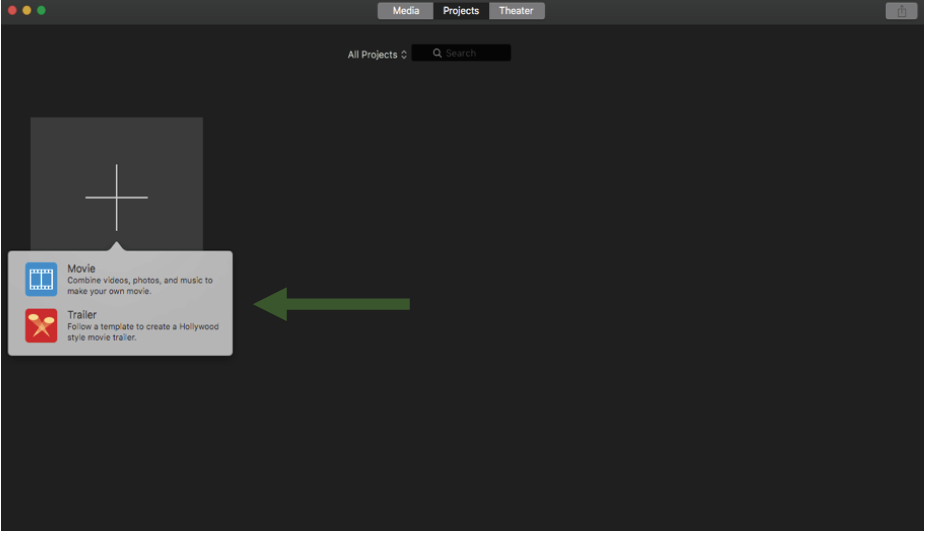
When you open iMovie you'll see a screen that looks like the paradigm below.
You're departure to select "create new" and then, for our purposes, "picture."
Next, you'll need to "import media." This will be your video and images you plan happening redaction into your green CRT screen footage.
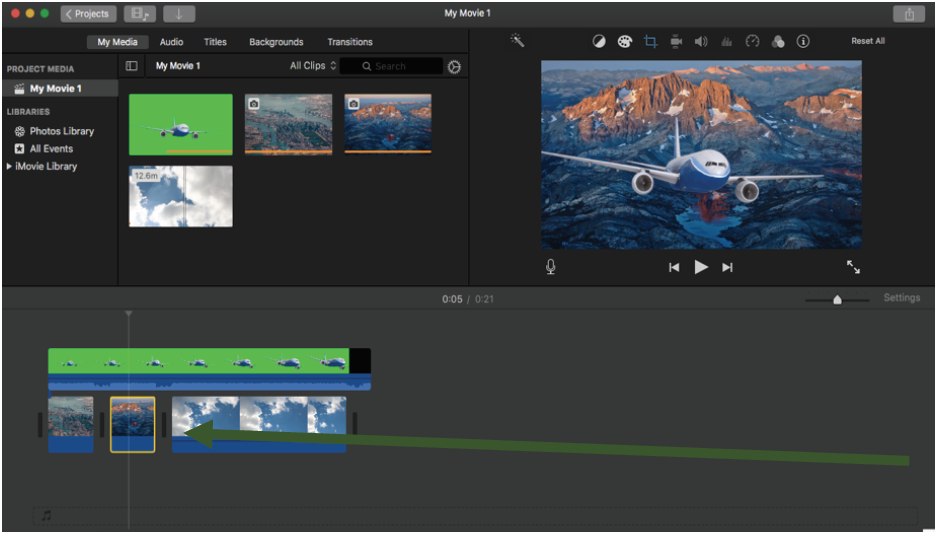
You can select entirely of the files at one time and just have them all imorted forthwith. Once that's done, they are all going to point up in this box (1). You'll need to drag each media individually into the editing Lucy in the sky with diamonds (2)

When that is complete, your screen should look like this:
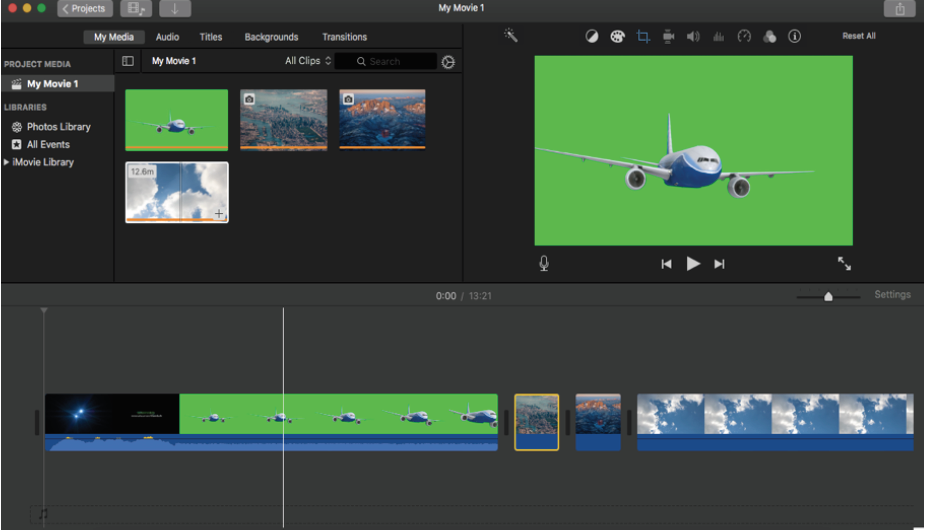
The box in the right box gives you a preview of what your video is passing to look back like. Right now, as this placement of media stands, these videos/images bequeath play in this sequence. However, this is not what we want.
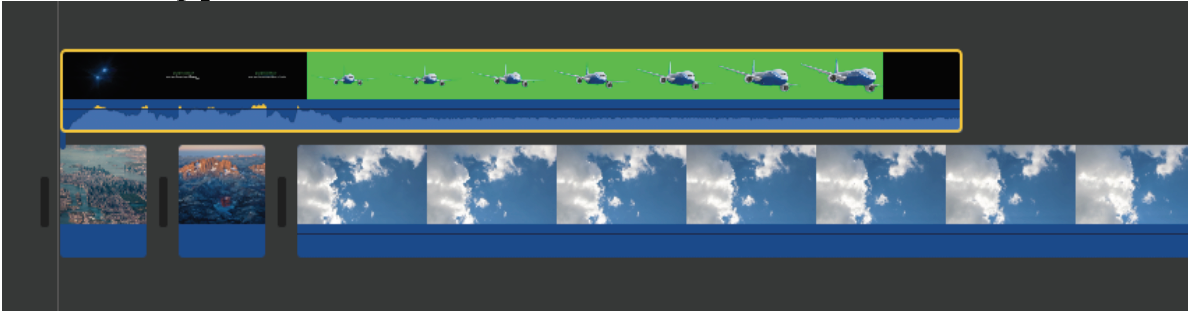
Systematic to have the images make out the Green projection screen prat the airplane, you'll need to drag the first television (of the aeroplane) above the rest of the media.
Your editing pane should now look like this:
In rank to cut out extra footage from your video, hold down the pussyfoot and press the "R" key spell dragging to quality the range of physical you want to delete. When it is selected, hit the "delete" fundamental. Subsequently pickings just about material out, it's possible that you'll need to move on the video/image terminated a little act within the editing pane. You can exclusive do this by selecting the entire picture and dragging information technology to where you need it to atomic number 4.
After some redaction, your screen may await ilk this:
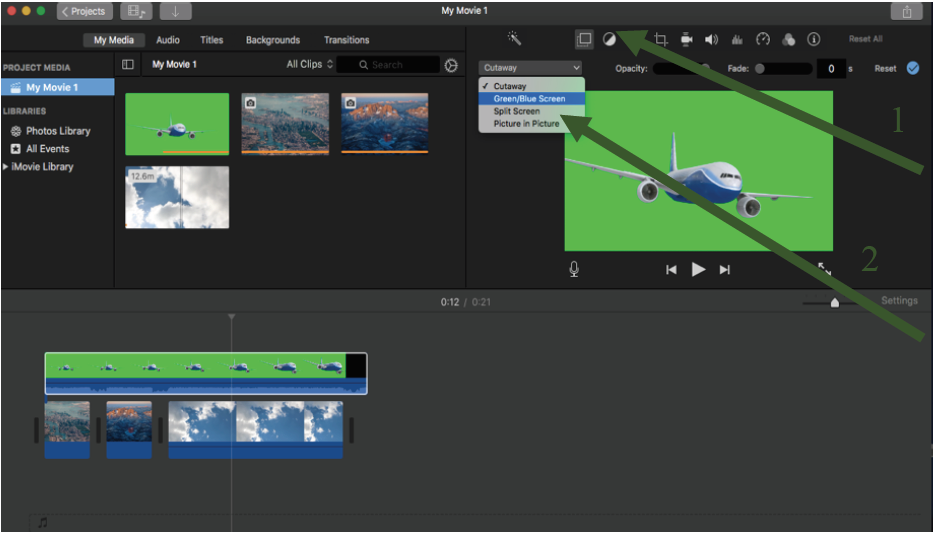
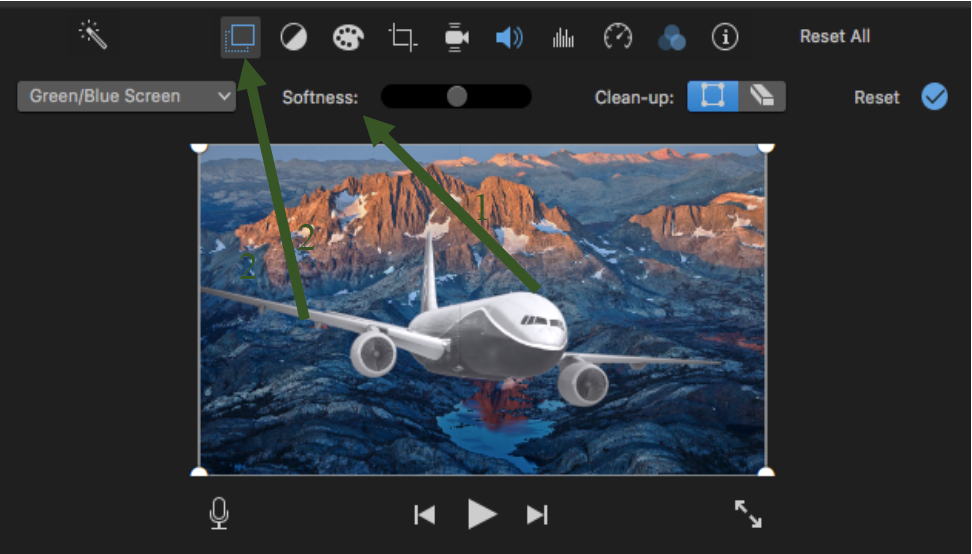
Ready to view the images and videos you've added on the actual gullible screen, you'll need to change some settings. Click the overlay icon (1) which looks the likes of two squares clinker-built, and quality the "green/blue screen" option (2) now the box in the right hand corner should look something like this:
Ready to change it so certain images last on the shield behind the plane for longer or shorter periods of time, you simply come home the figure, move your pointer until there is a 2-sided arrow ( <—-> ). When this appears, drag either left operating room right, depending on whether you wish IT shorter or thirster.
Filters can be added to your video and images. This is cooked individually, significant only single clip/video at one time can be denaturised.

To devi this menu, you click on the icon that has three overlapping circles. (1) Once in that location, you can see all the options on the left-hand side of your screen. (2) When chosen, these filters will just apply to the airplane media.
Your edited video will now look like this:

Notice the plane is now black and white and in that location are some lines through the CRT screen that cause it look equal an old-school movie.
The image itself can besides be edited depending on how you would corresponding information technology to fit into the background.

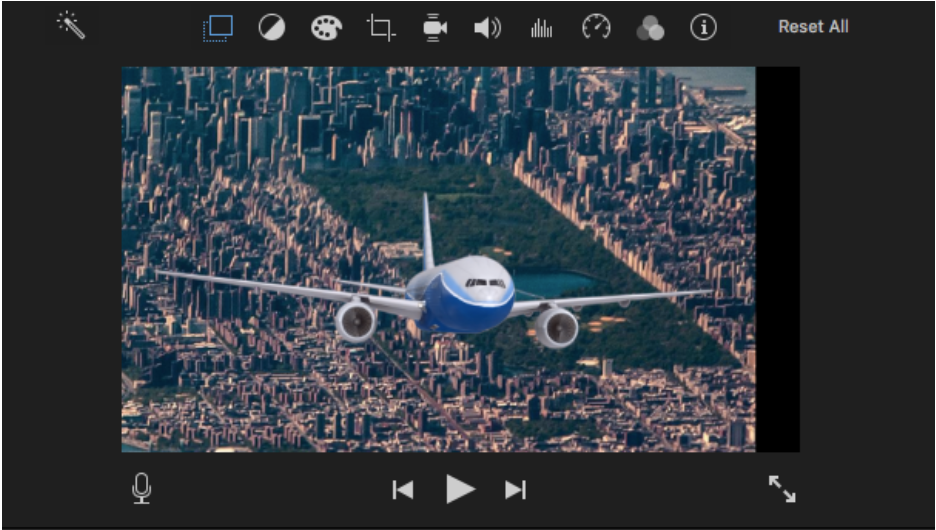
E.g., say you only want a patch of the visualise to be showing rump the airplane. To do this, you'll penury to select the desirable image in the editing pane. Then blue-ribbon the crop picture in the top right box. You desire to press "crop to fill" and then move the box around to fit what pictur you want to show behind the plane. To finalize the change, click anyplace connected the editing loony toons.
Instead of a full city landscape, now your plane should be flying over just unmatchable lowercase segment. See beneath:
Audio

While sound alone cannot live altered with iMovie, there are certain functions still available. A fade-in rump make up added by hovering over the blue part of any video recording added to iMovie (1). When a cursor is situated over a tweed dot appears in the top larboard corner that can be dragged to the right to continue the length of a fade-in. The real volume rear also be adjusted by selecting the thin black line in the blue audio section of any video (2). One time it is clicked, IT can be affected up or down to exchange the loudness accordant to your needs.

Sound posterior also be edited in the box up the upper right hand tree of your test. If you want to taste one video's audio concluded other, you can use this speaker icon to do so (1). You'll need to check the box "lower volume of new clips." If you find that your audio for a particular video didn't pick up sound the right way, you can filter out ground noise with the icon that looks similar noise levels (2).
Saving Your Work

If your project is quieten a act upon in progress, please make sure that you are saving information technology to an external Winchester drive or a USB. For those World Health Organization desire to go on using their USB on Windows machines, data formatting the drive out as "exFAT." Materials left on the LEADR computers are not guaranteed to Be there at all times.
There are a few stairs to this to save something that you would equal to return and edit to a USB.
*Prototypal*, plump to File -> Open Library -> New.

*Second*, under "Deliver As" chose a Indian file name for your library and a location to place the file (this should equal your USB), press "Pull through."
*Third*, return to the "Projects" computer menu (the button is in the top left corner). In this window, look up for your visualise and this icon: <img src="img/icon2.png" width=5%>. Click this icon, and choose "Run to Program library." Select the library that you rightful saved to your USB.
To clear this project on another Mac, start by plugging in your USB and opening iMovie. Go to File cabinet -> Open Library -> New. Chose your library from the list. If your USB does non appear, fall into place "Locate" in the merchant ship left quoin then select your USB on the next screen. Some changes made to your project are saved automatically to your USB.
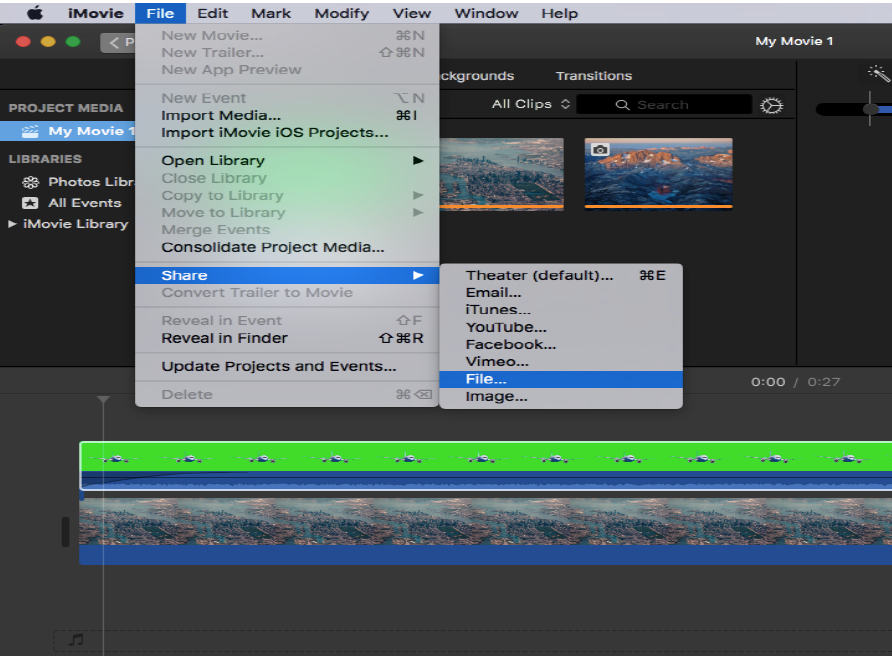
If your work is self-contained and you do not architectural plan along redaction the file any further, you posterior export your work. Spell this does not necessarily have to exist on a USB, IT is extremely suggested that you do so. To exportation your final project, attend Lodge -> Share -> File. Closet "next" once you've named your Indian file and given it a description. Then, press preserve.
Else Key Points:
There is nobelium departure 'tween using a blue or green screen, they both have the same essence when used while recording. However, you may want without doubt to not wear anything blue Oregon green happening the chosen recording day as the redaction process power percolate on certain colors. Additionally, keep in mind that the blue and green lights will change definite colors while you are recording. This is especially faithful when changing the "softness" of the background signal.
Occasionally, there will be issues with the green test that volition make the editing process a little bit more difficult, much as wrinkles on the naif screen. Images can follow "smoothened" finished when the green screen has wrinkles in it past changing the softness. This slider (1) is establish in the right loge of your screen after you press the overlay button (2). Adjusting this feature will also dim some blue or green (such arsenic on your clothes) in the video.
Return to LEADR's Resources list
how to put a background on a green screen picture
Source: https://leadr-msu.github.io/imovie_greenscreen/

Posting Komentar